Using PowerPoint Tables for Math Printables
share this timesaver:

Please Note: This post has been updated for Google Slides. Please click the following links to get the latest time-saving tips:
I love making printables for my students in math…but setting up number lines and fractions? Not so much. It can be SO time-consuming to line up all those little textboxes. Since a great deal of our school year involves number lines and fractions, I wanted to find a way to set them up more quickly.
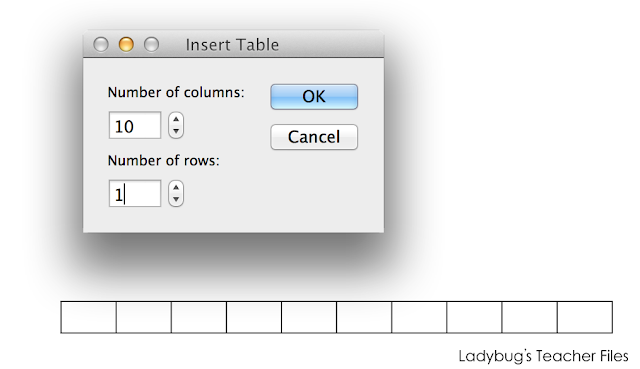
So I turned to tables! Why tables? They make everything lined up perfectly with minimal effort on your part! Here are the steps for each… Create a Number Line with Tables First, create an arrow line: Then, insert a table with 10 columns and one row:

Change the color of the table to No Fill:
 And click on Inside Borders to create the lines:
 You will also need to click on the Toggle Left and Toggle Right Border to add these lines as well:
 Drag the table over your arrow line:
 The lines in the table should be evenly spaced out (unless they are accidentally shifted) and will save you time in designing all those separate little lines.
And there’s more!
You can use a second table to easily align the numbers on your line! Create a new table, this time with 11 columns and one row:
 (I select the borders again, so I can see this table easily…this will help when you are lining up your numbers to the line).
Select the entire table to format the font type, size, and color. Be sure to center your text as well. Type up your number line, hitting tab each time to jump to the next cell:
 As in the previous table, the cells should already by evenly distributed…meaning you only have to drag the table into place, everything should be spaced out for you. Once you have the numbers where you would like them, deselect all borders:

 Create Fractions with Tables
So if you like the number line tricks, you’ll LOVE this next one!
Set up a new table with one column and two rows:
 Make the table white (or choose No Fill). Then click in the first cell. Go to the borders and select the Bottom Border to make the fraction line:

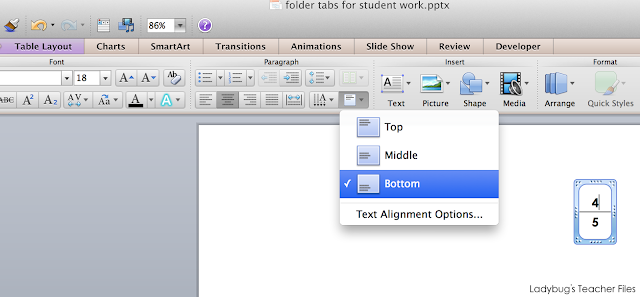
 Select the font type, color, and size of your choice (once again, be sure to center your text). You can also set the alignment of the numerator to be on the bottom of the cell, so it is closer to the fraction line:
 Adjust the width of your table so the fraction bar isn’t too wide:

 Copy and paste this little table to create other fractions:

 And that’s all!
I hope these little tips will help save you a LOT of time!
Do you have any PowerPoint math tips to share with us?

Kristen Beakey
I’m an elementary math coach with a passion for sharing beautiful, streamlined solutions to save teachers time. Ladybug’s Teacher Files has been a work of love since 2010. Filled with organization, time-saving ideas, and make and take tech tutorials…I strive to save you time in all aspects of your teaching!


