
Rounding to the Nearest Ten: 4 Tools to Build Automaticity
Share this post:

Rounding to the nearest ten can be a challenging concept in 3rd and 4th grade, especially when students are not yet secure with place value.
And place value is key when it comes to the rounding standards, all the way through 5th grade.

Oftentimes, rounding to the nearest ten is taught by the rules:
Though this method does require place value knowledge in finding the necessary digits, things can get very confusing for students who struggle with place value.
We want our students to round based on place value…but thinking of the entire number, so they can round with automaticity.
Why Automaticity?
These aren’t math facts.
Rounding isn’t just a standard to cover in isolation but a process we use for estimation. As our students move through the grade levels, estimation is vital for:
When our students round, we want them to see 36 and understand it is closest to 40, without hesitation.
And the same is true with rounding larger numbers to the nearest ten, knowing that 598 rounds to 600.
3rd graders who can round to the nearest ten with automaticity will be best prepared for rounding multi-digit numbers to any place in 4th grade (always a challenging standard!).
And these 4 key tools help build a true understanding of rounding based on place value, to help students round with automaticity.
Place Value Disks
Place value disks are a math manipulative that can be used for so many concepts in 2nd, 3rd, and 4th grade math.
And rounding is no exception!
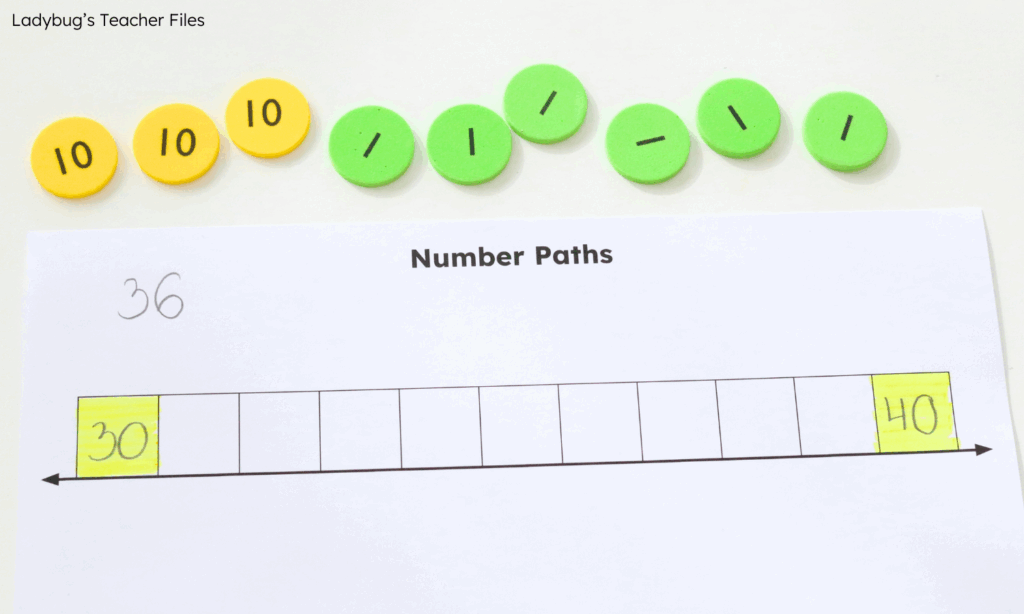
These disks are one powerful tool for rounding to the nearest ten, helping students:
Place value disks are key in building a foundation for rounding to the nearest ten, especially when paired with this next tool.
Number Paths
Number paths are a model generally used in the primary grades. But these visual number lines are extremely helpful when rounding to the nearest ten in 3rd and 4th grade!

Number paths support students as they:
And my favorite thing about number paths? They are the perfect tool to help students to understand and locate midpoint numbers.

Number paths are always embedded into the lessons I teach for rounding to the nearest ten, for two-digit numbers and three-digit numbers.
Once my students are able to round with automaticity on number paths, we move on to this next tool.
Number Charts
Number charts provide yet another visual to develop rounding based on place value understanding…especially as we move to rounding larger numbers to the nearest ten.
But we do NOT use the rounding chart with a line down the middle separating the numbers with “Round Down” and “Round Up” arrows.
There’s nothing wrong with this chart. But in our quest to round with automaticity, we want our students to discover rounding patterns based on place value.

There’s something so powerful about highlighting related numbers and asking students what they notice!
Once students have had a chance to explore key patterns for rounding to the nearest ten with manipulatives and models, we begin rounding in a purposeful sequence.
Scaffolded Steps
This last idea is more of a teaching strategy than a tool, but an important one!
Over the years, I’ve learned to use this sequence in teaching students to round with automaticity:

We also follow this exact sequence for rounding to the nearest ten and hundred.
Get Started Now
Ready to teach rounding with automaticity? I have all the hands-on, scaffolded lessons ready for you…no need to plan a single bit!


Thanks for checking out these 4 tools for rounding to the nearest ten. Is there anything you haven’t tried before that you would like to implement? Or any other ideas to share?
I always love to hear your thoughts!

Kristen Beakey
I’m an elementary teacher who is driven to design hands-on, scaffolded math lessons and tools for students in 2nd-4th grade. My passion is helping struggling students gain confidence and understanding in math, while saving you time in teaching (because you are busy enough!).

